Want to increase your followers? Avoiding screen recording mistakes can surely help you.
Want to know how? Let me tell you from my experience.
Being a creator taught me one thing you can’t take your screen recording quality for granted. No matter how good your content is, it will never be able to appeal or captivate the viewers for long.
After acknowledging the utmost significance of the screen recording quality, I decided to create a comprehensive write-up focusing on the key role of quality in screen recording and how to achieve smooth recordings.
It’s my personal learning of the last few years which will surely help you in your career.
So let’s get started.
Preparing Your System for Optimal Recording
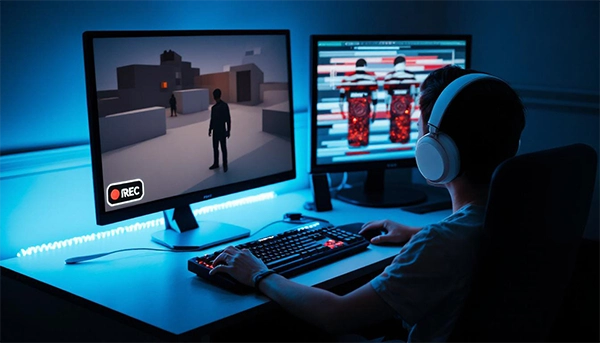
Recording quality starts with your computer’s performance. Make sure you check all settings that can interfere with recording. When I record gameplay I do the following things to have a smoother experience:
- Close resource-heavy applications and browser tabs to free up RAM and CPU resources.
- Disable notifications and background processes.
- Update graphics drivers to prevent screen tearing and frame drops.
- Clear at least 10GB of free storage space for temporary recording files.
Choosing the Right Recording Environment
Before starting make sure to have no interruption. Cancel all the possible noises and have a comfortable space. Manage your recording setup accordingly to avoid any disturbance after you start.
I make sure to have the following things in my setup:
- Set up in a quiet room with minimal echo and background noise. Avoid hard surfaces like bare walls and uncovered floors that can create unwanted sound reflections.
- Position yourself away from windows to avoid changing light conditions. Natural light variations can affect webcam quality if you’re including camera footage.
- Use a solid, neutral background that won’t distract viewers. Remove visual clutter that could draw attention away from your content.
- Arrange your workspace to minimize reaching and movement.
Audio Setup Essentials
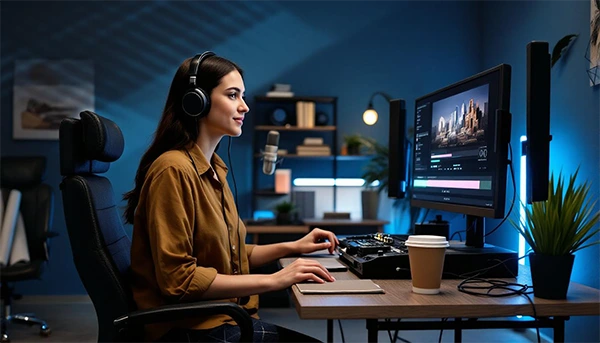
Audio quality often determines whether viewers continue watching your content. While recording the screen, you have to make sure the audio of the screen is clear. And if you have any added sound like commentary or any background music that should also be audible. Bad audio is a major upset for the viewers and you can’t afford it otherwise you will lose your audience. As a gamer, I make sure to have a realistic audio experience for my viewers which helps me engage them with the stream.
Fun Fact
Online Gaming has become mainstream with over 2.7 billion gamers worldwide
Sound management involves both equipment selection and proper setup:
- Use a dedicated USB microphone instead of built-in laptop mics. Built-in microphones often capture system noise and provide poor frequency response.
- Position the microphone 6-8 inches from your mouth to capture clear vocals. This distance balances voice clarity with natural sound.
- Add a pop filter to eliminate plosive sounds. This simple device prevents distracting audio spikes.
- Test audio levels before each session to ensure optimal gain settings.
Consider acoustic treatment for your recording space:
- Add soft furnishings to reduce room reflections.
- Install acoustic panels on walls to absorb sound waves.
- Use carpets or rugs to minimize floor reflections.
- Position your desk away from walls to reduce sound bouncing.
Monitor your audio setup regularly:
- Check microphone settings before every session.
- Listen to a test recording with headphones to catch subtle issues.
- Verify that both system and microphone audio are being captured correctly.
- Adjust gain levels based on your speaking volume and room acoustics.
Technical Settings for Professional Results
Understanding technical settings is crucial if you want to have an effortless experience. Know about your computer and your camera to get a perfect result out of them. Core parameters require careful consideration:
- Match resolution to your screen’s native resolution (typically 1920×1080) to prevent scaling artifacts and blur.
- Set frame rate to 60fps for smooth motion, especially for software demonstrations.
- Use variable bit rate encoding with a target of 8-12 Mbps for sharp image quality.
- Select the H.264 codec for optimal compression and compatibility.
Storage and performance factors are important to avoid any storage issues:
- Calculate the required storage space before long sessions.
- Monitor CPU usage during recording to prevent performance issues.
- Set up separate drives and system files.
- Configure automatic backup of files.
Resolution and Frame Rate Guidelines
Having a suitable resolution and frame rate makes the visuals way better for viewers. Different content types demand specific technical configurations.
Text-heavy content:
- Maintain 1440p resolution minimum for text clarity.
- Use scaling settings that keep fonts crisp.
- Test readability on various screen sizes.
Software demonstrations:
- Capture at 60fps for fluid cursor movement.
- Enable mouse click visualization.
- Record at 100% scaling for accurate interface display.
Static presentations:
- 30fps provides adequate quality.
- Focus on text clarity over motion smoothness.
- Optimize compression for slide transitions.
Gaming and motion-heavy content:
- Match source frame rate (usually 60fps+).
- Use GPU acceleration for encoding.
- Monitor system performance during capture.
Recording Best Practices
Execute it with precision:
- Script key points but maintain natural delivery. Make your streaming more engaging.
- Move the cursor smoothly and deliberately between actions.
- Pause briefly after each significant step.
- Keep individual segments under 10 minutes for better viewer engagement.
Post-Recording Enhancement
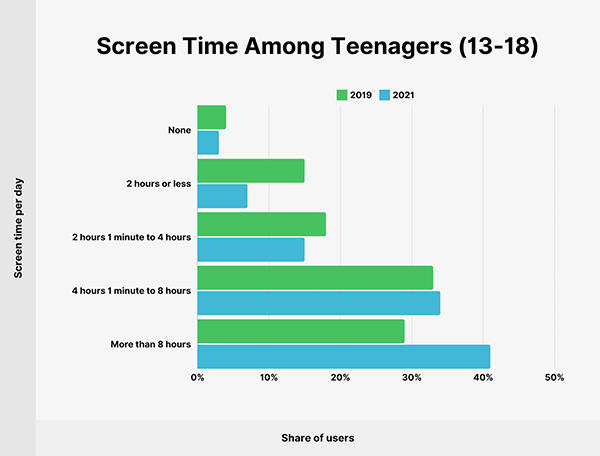
Polish your product before sharing to maintain viewer engagement. Even minor edits can significantly improve the final quality and professionalism of your content. Giving attention to details can enhance your product. My major audience is teenagers and to catch their attention, editing plays a crucial role.
Given graph shows the average screen time but they move quickly from one page to another.
Consider the following things while editing to have a higher screen time in your stream:
- Trim dead space from start and end.
- Add highlights or zoom effects for important details.
- Normalize audio levels across the entire process.
- Export in MP4 format with H.264 encoding for universal compatibility.
- Remove any unintended mouse movements or system notifications.
Common Quality Issues and Solutions
After doing all the major work don’t forget to give a last check to basic but crucial things like:
- Laggy playback: Lower recording resolution or frame rate.
- Audio desync: Enable hardware acceleration in recording software.
- Large file sizes: Use two-pass variable bit rate encoding.
- Choppy footage: Close background applications consuming CPU resources.
Conclusion
I will end this article by saying that if you want to stand out in the crowd of creators then you must know these tricks. It will help you in creating quality products for your audience.